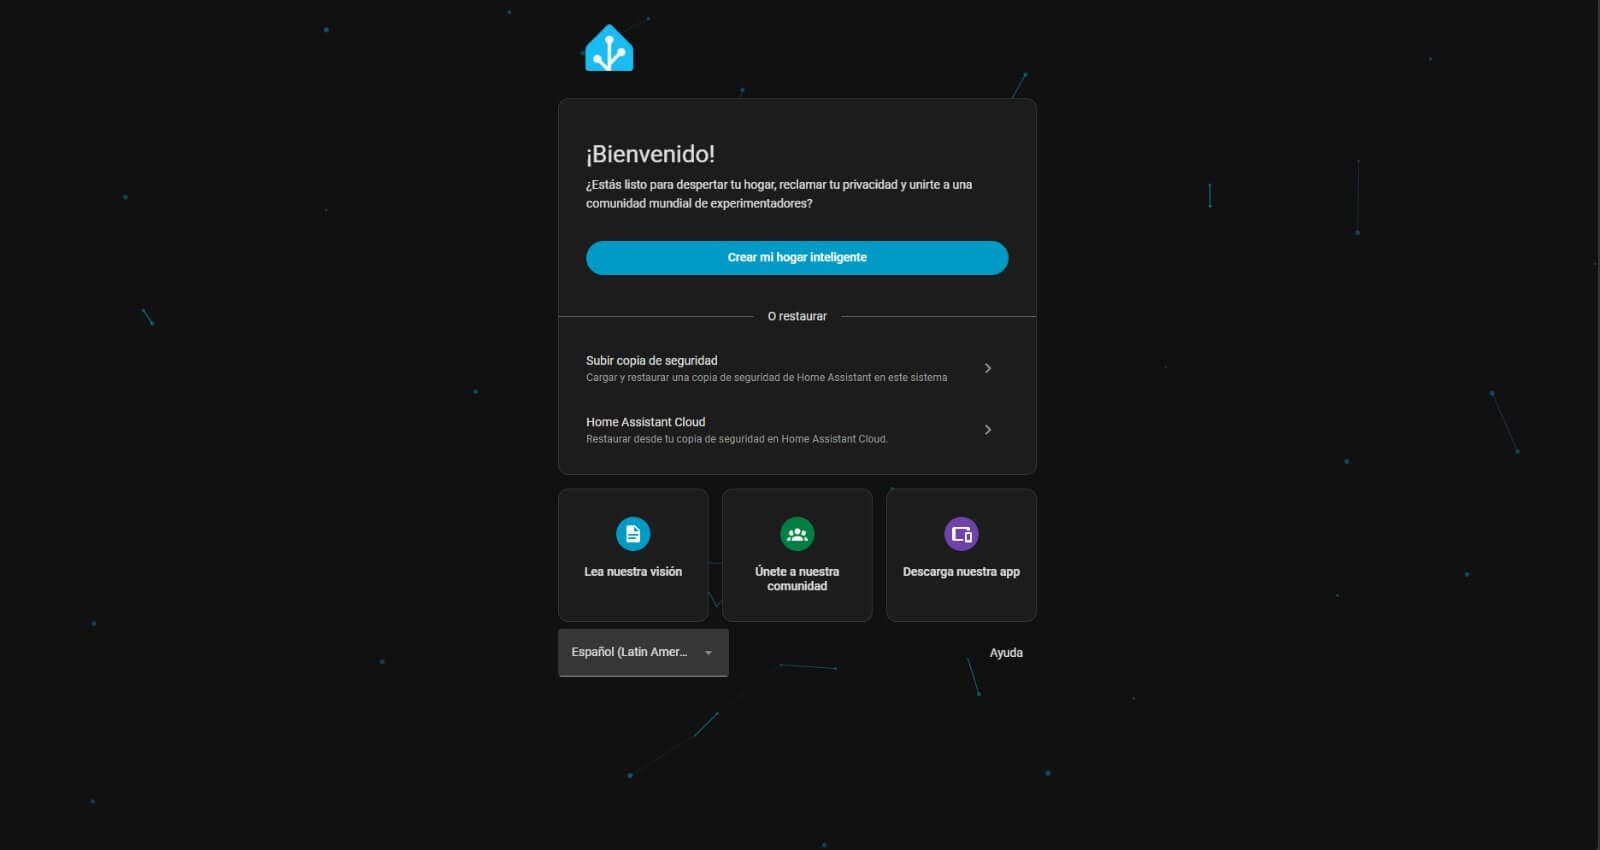
Installing HAOS on Proxmox: A Step-by-Step Guide
Personally, home automation is one of the hobbies I find most interesting and with the rise of LLMs (Large Language Models), very powerful integrations arise that allow you to make automations in natural language in a simple way, however the easy route comes at a cost: sending data to third parties (Amazon, Google, Apple, etc.) and money because if you stop paying you are left with nothing or limited in terms of functionalities, in addition to the fact that if your internet connection goes down your smart home stops working.
However, there are open source alternatives and HA (Home Assistant), is the gold standard with respect to home automation, so, with some effort, you can have an assistant running on your own infrastructure.
Now, the question arises: Where to host HA? Truth be told, there are several paths, Ubuntu Server + Docker + HA, Bare Metal HAOS, Proxmox + HAOS, etc. There is no single answer, there are several paths that lead to the same result, there are even discussion forums where nerds start discussing what is the best combination and it is quite entertaining since that type of discussions allow you to understand different perspectives or leave you wondering what the hell they are talking about and make you give up. Don't worry, nobody knows this stuff from day one and with a little patience you will see that it is not so difficult to speak in the language of nerds.
HAOS vs HA
If you're not very into this world, you're probably wondering what the hell HA and HAOS are, so we can quickly see it as follows: HAOS is an operating system based on a Linux distribution and HA is like any program you can run on your computer, but with important nuances, Remember that these types of services need to be isolated so as not to conflict with other applications. If you didn't understand me, just stick with the idea that both are Home Assistant at the end of the day, but HAOS works like an operating system.
Why use Proxmox?
It is important to be clear about your goals here, so if you are reading this I would hope that you already have them and if not, I will tell you mine.
KISS
KISS stands for “Keep It Simple, Stupid” and it's my life motto (Not really, but I like the approach), the point is that in systems development this design principle encourages us to keep things simple and avoid unnecessary over-engineering, and you will say what does this have to do with it? the answer is a lot, HA has a store, which previously referred to its elements as add-ons, as of today 2026 they are called applications, see it as an app store/play store with various apps that allow you to expand the capabilities of HA with a few clicks, however, this store is only available in HAOS. With HA + Docker, I would have to install each application manually and the truth is something that caught my attention, but I didn't want to give up what little social life I have, so I opted for HAOS. During my expeditions to discussion forums of this type I read several comments from server administrators and even though most of them were used to doing that kind of work, they preferred HAOS, though, of course, there was always that one diehard defending Docker to the bitter end.
Will you only run home automation?
This question is decisive, if you have limited hardware or you don't plan to go further perhaps your best option is Bare Metal + HAOS, so there is still time to redeem yourself, but if you have hardware to spare, you plan to set up your own infrastructure with different microservices and you are not afraid to break things and expand your knowledge, Proxmox is the right way to go.
What is Proxmox?
Proxmox is a virtualization environment that we can install directly on top of the hardware and allows us to run virtual machines and LXC containers. It has a UI (User Interface) that we can access by default through the local network where the server is installed.
A practical example is that this allows us to have different operating systems installed on the same machine with the possibility of accessing each of them remotely.
So, besides installing HAOS, this approach also lets us add other operating systems, if the hardware can handle them, such as Ubuntu Server and in turn add other applications to make increasingly powerful integrations.
Hardware
First of all, let's start with the premise that we are working with a server, not a computer with an operating system (OS) such as Windows or MacOS. This is important because we must be very clear about what we are doing from the beginning and if you are wondering what does it have to do with the hardware? It has everything to do with it, but before we get into the specifics we must be clear about a couple of concepts.
Architecture
The Proxmox + HAOS combination is part of the client-server architecture, with HAOS being a service that lives on the server and Proxmox being a software layer (hypervisor) that manages and distributes the hardware resources allocated to each service.
The concept is basically summarized in that one or more services live on a server (high-performance computer), which in turn provides these services to other equipment such as computers, cell phones, tablets, Smart TVs, etc. These devices are the “clients” and communication is carried out through a local network or the internet.
Resource allocation
Since we are clear that a server with Proxmox is usually a computer with plenty of resources available, we will leave aside the idea of referring to hardware as technical specifications of physical parts and we will approach them as dynamic parameters that can be modified, in some cases with certain restrictions.
So, these are the recommended requirements:
- 2 vCPUs
- 2 GB RAM
- 32 GB of storage
Within Proxmox we can change the allocation of resources at any time, however, there is an important nuance, although we can reduce or increase all the parameters, reducing the storage is delicate since there is always the possibility of corrupting files, so I recommend starting with what is recommended and going up as necessary.
On the other hand, for more advanced integrations with local AI through the Whisper and Piper apps for speech-to-text (STT) and text-to-speech (TTS), at least in my tests, the RAM requirement doubled from 2 GB to 4 GB, because Whisper could not start with only 2 GB allocated to HAOS.
Installation
Well, at this point I already take for granted that you have a server with Proxmox, the installation is quite simple, even so, here is another post where I walk through the installation process.
With the above ready, the only thing we will need to install HAOS is access to the server through a client, in my case I will use a Windows PC.
In the same way something very important is to have hardware acceleration enabled on the server, this adjustment is made from the BIOS , and the location of the option depends on your motherboard, I recommend doing a search on the internet based on the model of the motherboard.
Upload .qcow2 to the server
Without further ado, the first thing is to download HAOS, via the following link. The required file is called KVM/Proxmox (.qcow2) and it will be the only time that something will be downloaded.
Then a folder is created on the server to save the .qcow files, it is not mandatory, but it is recommended to always have everything organized. To do this, in the Proxmox UI console, you can use the following command:
mkdir -p /var/lib/vz/template/qcow/mkdir -p /var/lib/vz/template/qcow/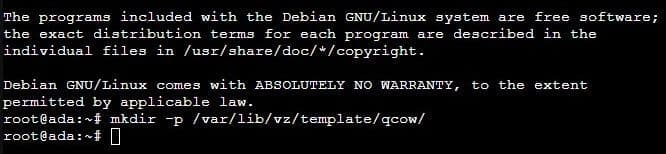
When running it, if it does not throw any errors, it means that everything is fine and we will be able to close the console since the new directory was created successfully.
What follows is to upload the .qcow2 file to the server, for this in the folder where the file is, you must right-click and select open terminal, with that a terminal will open in that folder.
In that Windows terminal (PowerShell), run the following command on a single line:
scp .\haos_ova-17.2.qcow2 root@192.168.18.19:/var/lib/vz/template/qcow/scp .\haos_ova-17.2.qcow2 root@192.168.18.19:/var/lib/vz/template/qcow/Here is an explanation:
- scp -> Copies files over SSH
- .\haos_ova-17.2.qcow2 -> The source file on the client
- root@192.168.18.19 -> Destination user and server; replace these with your own
- :/var/lib/vz/template/qcow/ -> Destination folder on the server
Create Virtual Machine
Now in the Proxmox UI, in the upper right corner you should select a button called Create VM, which allows you to start the setup process.
The first window is called General, here unless a very specific configuration is necessary you can leave the default values, I just recommend noting the VM ID and leaving Add to HA unchecked.
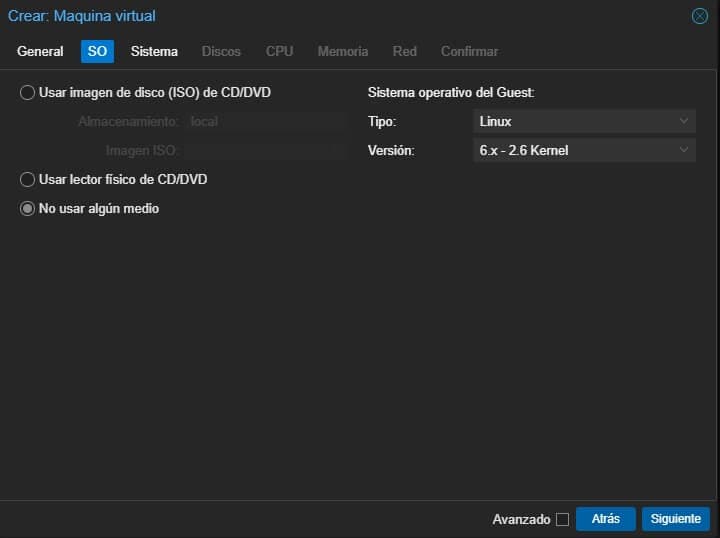
The next tab is OS. Select Do not use any media because it will not be installed from an ISO but from the qcow image directly. In Guest Operating System it must be verified that Linux has been selected.
The third tab is System. This section has quite a few options, as shown below:
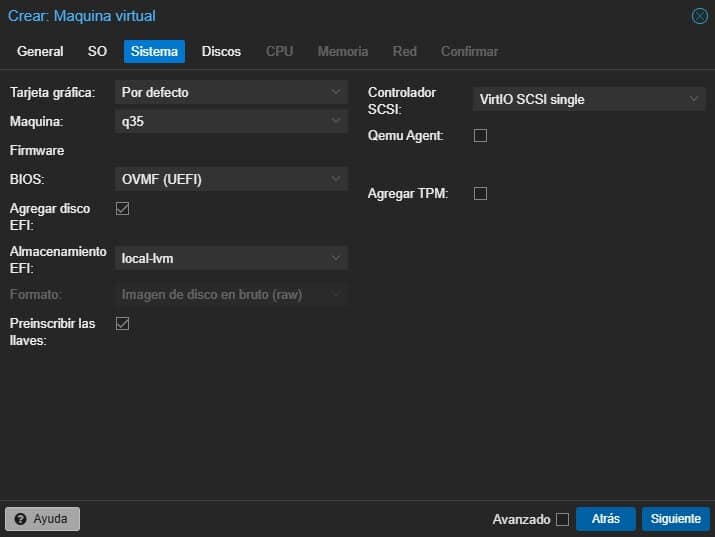
A brief explanation, Machine refers to the virtual chipset. In this case, q35 is the most modern and makes it easier to pass physical hardware through to the VM. Under BIOS, the UEFI option is also the most modern and gives advantages such as a faster start. On the other hand, Add EFI Disk should be selected because UEFI needs a small portion of memory to save its boot variables and finally in EFI Storage the checked option indicates that Proxmox local storage will be used to save the EFI configuration file.
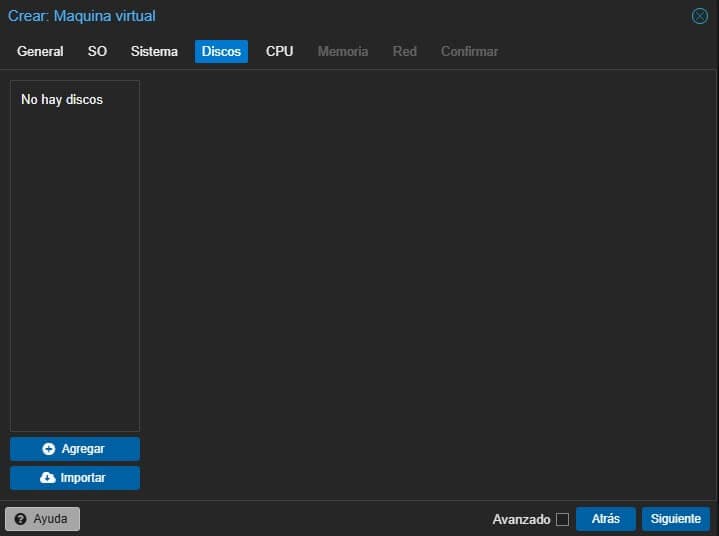
Next, there is the section called Disks, this is quite simple, Proxmox gives some default values, what you have to do is select the trash can icon that is on the left side next to scsi0 since the HAOS qcow2 image will be imported later as a disk, not from this section.
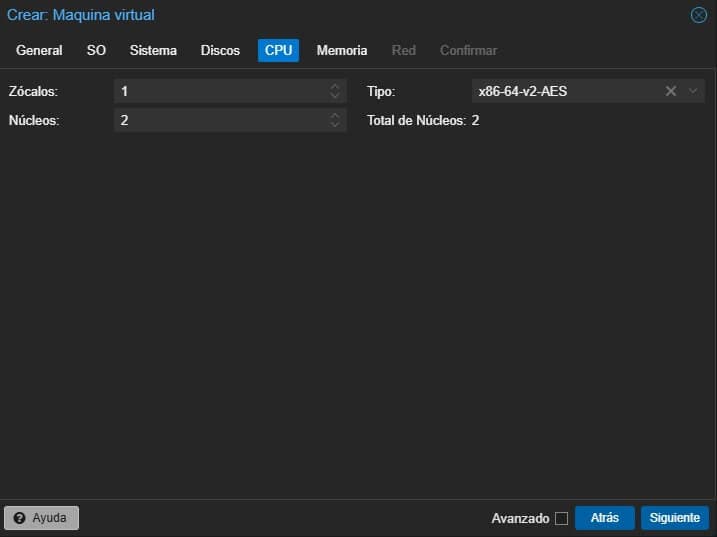
Continuing with CPU, I recommend using two cores and leaving Sockets set to 1, as shown below:
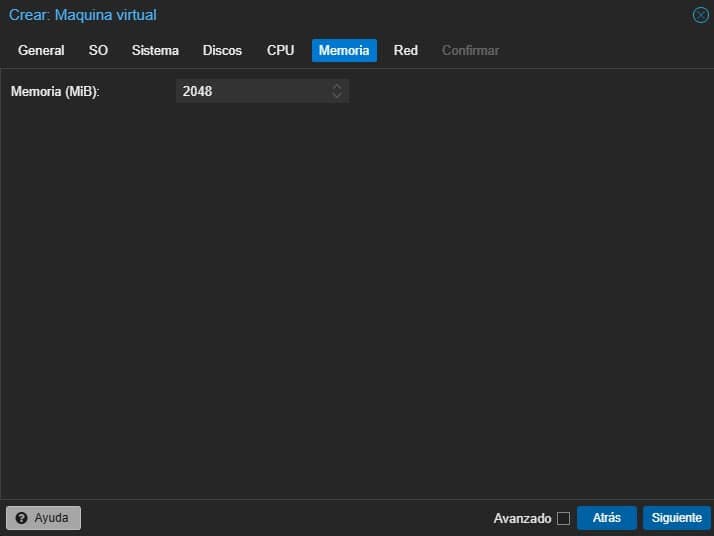
In Memory I recommend a value of 2048, the equivalent of 2 GB will be enough, unless you want to implement local AI functions from HAOS it is best to raise it to at least 4096.
In Network the default values will be used, with Bridge set to vmbr0 and Model set to VirtIO.
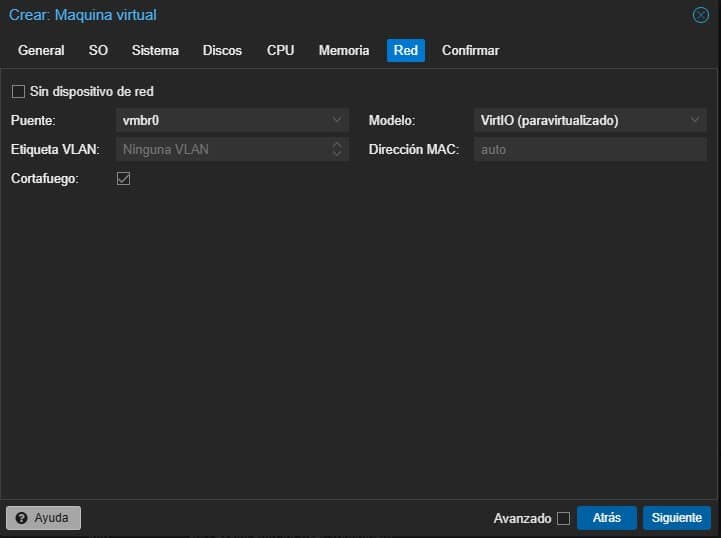
After finishing the configuration a summary will be displayed, if everything is fine you must select Finish with which the VM will be ready.
Import Disk
First, let's understand what we have created. Well, at this point there is already a VM created on the server, but without any disk assigned, which is the equivalent of having a PC without any storage unit attached. That disk that is missing is the file that was downloaded at the beginning, the famous haos_ova-17.2.qcow2.
To install that disk to the VM that has been created, the following command is used:
qm importdisk 100 /var/lib/vz/template/qcow/haos_ova-17.2.qcow2 local-lvmqm importdisk 100 /var/lib/vz/template/qcow/haos_ova-17.2.qcow2 local-lvmCommand Explanation:
- qm importdisk -> Imports a disk.
- 100 -> The VM ID assigned in the General tab during setup
- /var/lib/vz/template/qcow/haos_ova-17.2.qcow2 -> It is the path on the server, where the file is
- local-lvm -> It is the destination, i.e. the name of the storage in Proxmox where the disk will be saved
Now we can imagine that the disk is already screwed to the VM, so it is only necessary to plug in the data cable and the power for it to work. Go to the node where the VM is installed and select the VM. In the Hardware tab, open Unused disk 0, make sure Bus/Device is set to SCSI 0, and click Add. The disk with HAOS will then be installed and almost ready to use.
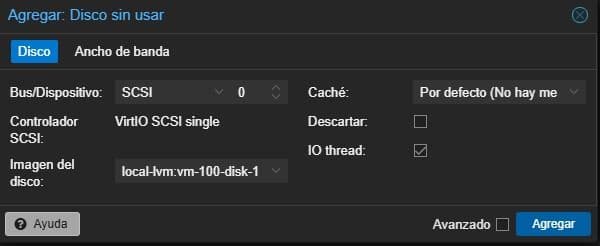
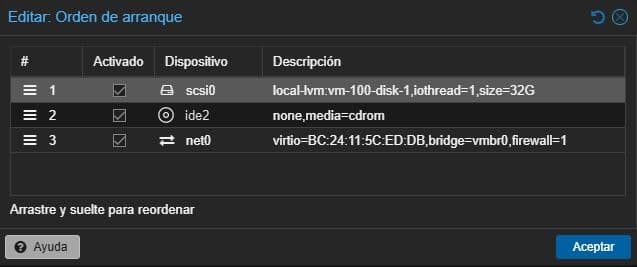
Finally, to leave the disk ready, you have to change the boot order, for this you must go to the following path in the VM settings: configurations > boot order.
Once there, this order will be established:
Disable Secure Boot
When you turn on the VM it will probably freeze, this happens because Secure Boot is enabled by default in OVMF (BIOS that was assigned in the configuration), to solve it you must press any key to enter the Boot Manager Menu, which will allow you to access the BIOS settings.
While in the BIOS, you must navigate through the following path to disable Secure Boot: Device Manager > Secure Boot Configuration, we will see a list with several options, we just have to go to Attempt Secure Boot and uncheck that box.
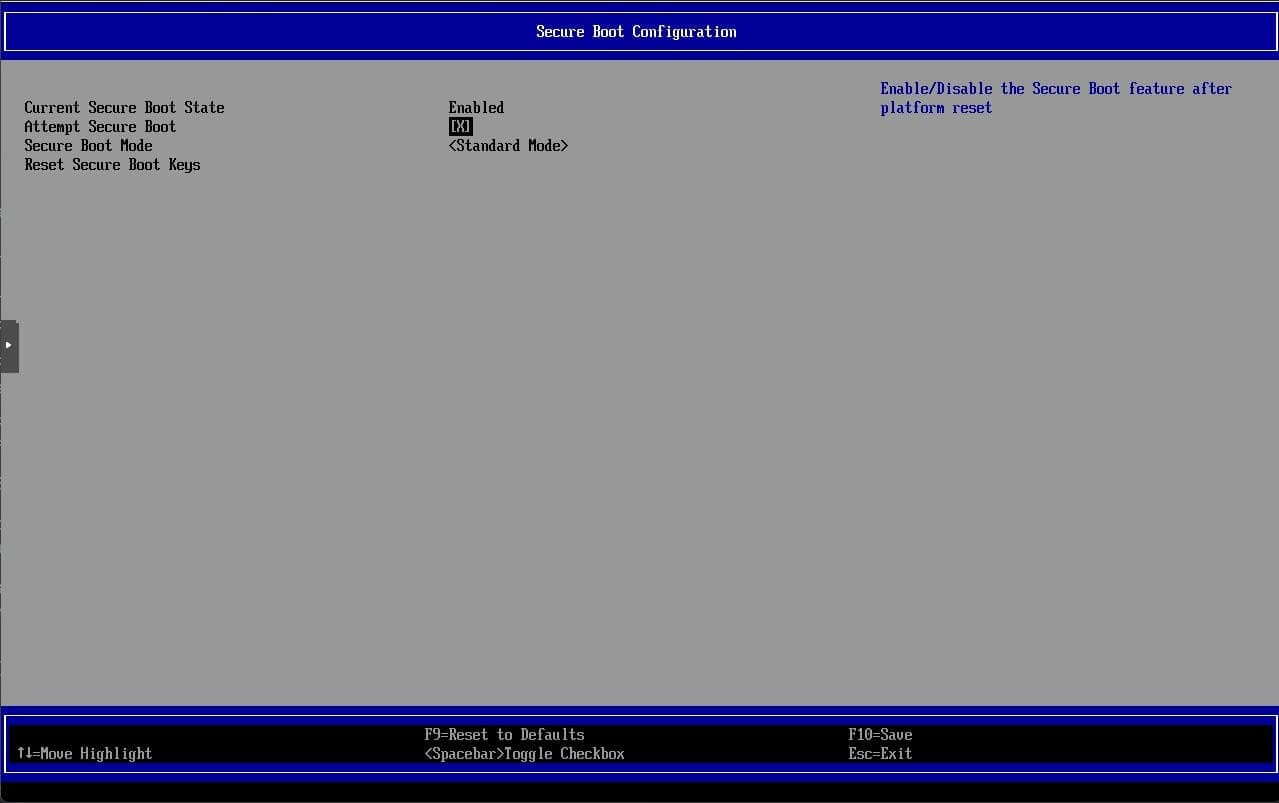
Finally, you should press F10 to save and Esc to exit. Once that's done, the VM will give us an IP which can be used from any device on the local network to access HAOS which is ready to use.